Underlay and sarking around a pitched rooflight
Every pitched roof lets a little water past its covering, and the underlay is what catches it. Wind drives rain up under a slate, capillary action pulls water sideways along a lap, and snow blows through a verge and melts on the battens. None of that is a fault. The covering sheds the bulk and the membrane below it carries the remainder down the slope and out over the fascia. Cut an opening in that membrane for a rooflight and the water it was already carrying has to be given a route around the frame instead of into it. That detail takes twenty minutes on the scaffold, it is buried for the life of the roof, and it decides more outcomes than the unit itself does. The wider sequence is on the roof window installation page. This is the layer underneath all of it.
A second drainage layer, and the water it is already carrying
It helps to stop thinking of the underlay as a backup and start thinking of it as a drainage plane in its own right. On an exposed slope in a south-westerly, a measurable film of water runs down the membrane while the roof above it looks perfectly sound from the garden. That film has been running since the roof was built.
Two consequences follow. The membrane has to be continuous from ridge to eaves with every lap facing downhill, and it has to discharge into the gutter rather than behind it. A membrane that stops short at the fascia and drips onto the wall plate is one of the most common defects found on older Gloucestershire roofs, and an opening halfway up the slope makes it worse by concentrating flow into two narrow runs either side of the frame.
Bitumen felt, breather membranes and what is actually under a Gloucestershire roof
Four generations of material turn up in this county, and they behave completely differently at an opening.
| Membrane | Roughly when | How it behaves | What it means at an opening |
|---|---|---|---|
| Nothing, with lime mortar torching between the slates | Pre-1900 stone slate and early Welsh slate | The covering and the torching are the whole weathering system | A new membrane has to be introduced locally, and on a listed roof that is agreed in advance |
| Type 1F reinforced bitumen felt | 1930s to about 1995 | Hessian or glass fibre core, high vapour resistance, goes brittle and cracks along the drape | Tears rather than cuts. Renewal usually has to reach beyond the opening |
| Polythene reinforced non-breathable sheet | Mid 1990s to about 2005 | Tough and vapour tight, so the void below still needs ventilating | Cuts cleanly and takes tape well |
| Vapour permeable breather membrane | About 2005 onward | Passes vapour, sheds liquid water, light and easy to dress | The easiest to detail, but the air permeable grades need care about wind uplift |
| Sarking boards, sometimes with felt over | Steeper Welsh slate roofs, any age | A solid deck the slates are nailed through | The board itself has to be cut and supported, not only the membrane |
Identifying which one is present is not optional information. It changes how far the covering comes back, how much new material goes on, and whether the void below needs a ventilation route that it did not need before.
Reading the membrane before the covering comes off
A slate or two lifted at the eaves tells you most of it. Bitumen felt that has reached the end of its useful life feels like a biscuit: flex a corner and it cracks rather than bends, and the reinforcement shows through as a grid of fibres. A breather membrane stays supple and prints a manufacturer’s name across it every metre or so.
Then look from inside the loft with a torch on a bright day. Pinholes of daylight along the line of the drape mean the felt has already split between the rafters. Tide marks running down a rafter face, or a dark line down one side of an existing rooflight trimmer, say that water has been arriving on the membrane and finding its way inboard for years. Those marks are worth photographing before anybody starts, because they set expectations about what will be found once the covering is off.
Cut to a shape, never to a straight slit
The failure that puts water on a ceiling is nearly always the same one, and it takes two seconds to commit. Somebody runs a knife around the outline of the new opening, drops the offcut into the loft, and sets the frame. The membrane is now open across the full width at the head, and everything running down the roof above the window arrives at a cut edge sitting directly over the timber.
The correct cut is a shape. The membrane is opened with a long horizontal cut at the cill line and two diagonal cuts running up and outward to the top corners, which leaves a large tongue above the opening and a triangular flap at each side. Nothing is removed until every flap has somewhere to be fixed. Those three flaps become the whole detail.
The tongue over the head, and the batten it gets fixed to
The head tongue is the important one. It is taken up over the top of the frame, laid back over the batten above the opening and fixed there, so water arriving from up the slope crosses the top of the window on the outside of it and is delivered to the sides.
The lap onto that batten is at least 150mm, and on a shallow slope it goes further. The tongue is fixed with corrosion resistant staples at roughly 300mm centres along the batten, then the batten is refixed over it so the staples are not doing the work on their own. Where the membrane is a breather type, the joint is taped with the manufacturer’s own tape rather than a general purpose one, because building tapes on a dusty membrane at 5 degrees Celsius in February are a poor bet.
Side flaps dressed into the frame’s own channel
Each side flap turns down against the side of the frame and finishes inside the drainage channel formed into the outside of the unit, not over the top of it. This is the detail people get backwards, and the difference is total: dressed inside, the membrane hands its water to a gutter that was designed to receive it; dressed outside, the same water is delivered onto the batten and the trimmer.
The flap is held with a bead of the frame’s own clip or with staples into the side of the timber, kept high enough that the fixing is above the water line. On a recessed installation there is more depth to work with and the flap has further to travel, which is one reason a recessed unit takes longer to detail than a standard depth one.
Below the cill, and where the water is handed back
Under the window the membrane is dressed down over the batten below the opening and lapped over the sheet on the course below, so the two side channels discharge back onto an unbroken drainage plane a course or two down the slope.
The discharge point matters. If the two side runs are delivered onto the membrane immediately under the frame, the water lands in a narrow band and travels down the same two lines forever. Taking the flaps wider than the frame, so the discharge is spread across the full width plus 150mm each side, keeps the flow diffuse. On a rear addition roof in Gloucester with only two metres of slope from gutter to abutment, that spreading also keeps the concentrated flow away from the abutment itself.
The collar that comes in the box, and what it is doing
Manufactured roof windows are supplied with an underlay collar: a preformed drainage skirt in a vapour permeable material that clips to the frame and gives the membrane a purpose-made surface to lap onto. VELUX call theirs the underfelt collar and it comes with a small gutter piece for the head. Fakro and Keylite supply equivalents.
The collar is not decoration and it is not a substitute for cutting the membrane properly. It is a manufactured version of the head tongue and side flaps, dimensionally correct for that frame, with the drainage channel connection already worked out. The site membrane still laps onto it, in the same order, downhill. Where a collar is missing from a delivery the honest answer is to wait for it. The separate insulation and vapour collars that go in with it are covered on the VELUX window installation page.
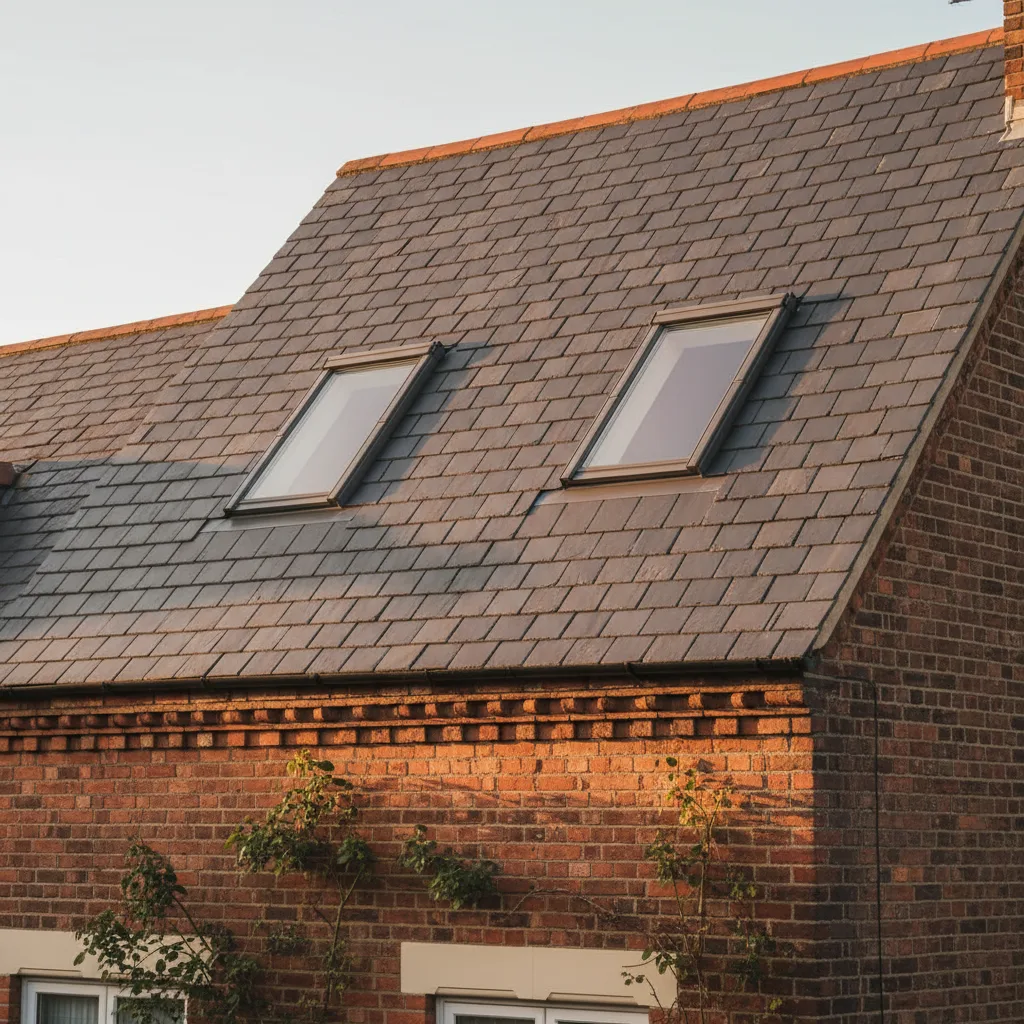
Sarking boards, and the Forest of Dean roofs that have them
Sarking is a solid timber deck laid over the rafters with the slates nailed through it, and it turns up on steeper Welsh slate roofs around Coleford, Cinderford and Mitcheldean, and occasionally on better Victorian work in Cheltenham. Older versions are square edged softwood boards with gaps between them. Later ones are tongued and grooved, and modern equivalents are structural sheet.
Two things change when sarking is present. The board is often acting as bracing for the roof plane, so cutting a rectangle out of it is a structural decision as well as a weathering one, and the cut edges need noggins fixed between the rafters to carry them. And the felt, where there is any, sits over the boards rather than draped between rafters, so there is no drape to work with and the membrane detail becomes a flat lapped one. A sarked roof is also unventilated below the boards unless somebody has made a route, which puts more weight on the vapour control layer inside.
Counter battens, and the drainage gap worth creating
A counter batten is a vertical batten fixed over the rafter line, on top of the membrane, with the horizontal tiling battens fixed over that. It lifts the covering clear of the membrane and creates a continuous drained and ventilated cavity up the slope.
It is not standard on a straightforward retile, but it earns its place in three situations that come up here. Over sarking boards, because the membrane otherwise sits flat on timber with nowhere for water to run. On any roof where the underlay is being renewed on an exposed western slope. And on a stone slate roof where torching is being replaced with a membrane, where the cavity is doing the job the mortar used to do. The cost is a day of battening and 38mm of extra roof thickness, and the gain is that water on the membrane never sits against a batten.
Brittle felt, and how far a renewal actually has to reach
Where the existing felt is 1930s bitumen, the plan of taking it back 300mm around the opening rarely survives contact with the roof. The material tears where it is handled, so the working edge keeps retreating up the slope until it reaches felt that is sound enough to lap onto.
The practical answer is to strip the covering back further than the opening needs, usually to the next full batten line above and below and one rafter bay each side, then lay a new piece of breather membrane across that whole area, lapped 150mm under the old felt at the head and 150mm over it at the cill. New under old at the top, new over old at the bottom. Getting that order the wrong way round puts a lap facing uphill, which is the one arrangement guaranteed to collect water. Where the existing felt is beyond working with over the whole slope, that is a finding for the survey notes and a separate conversation about the roof rather than about the window.
The drape between rafters, and why a taut membrane is a mistake
Underlay is laid with a deliberate sag between the rafters, usually 10 to 15mm on 400 or 600mm centres. The drape is what makes the membrane into a shallow gutter in each bay, and it is also what stops the sheet from being torn by movement and wind flutter.
Around an opening the temptation is to pull the new piece tight so it looks neat. Pull it flat against the underside of the battens and any water on it now has no channel to run in, so it spreads sideways instead and finds the first fixing hole it comes to. The new membrane goes in with the same drape as the original, and the tongue over the head is the only part deliberately held flat, because there it is being lapped onto a batten rather than asked to carry water.
Roofs with no membrane at all, and what goes in instead
Cotswold stone slate through Painswick, Bibury and Northleach is commonly laid straight on riven battens with a lime mortar torching, mixed with animal hair, buttered on from below between the slates. There is no felt, and the roof has been dry for two centuries.
Torching cannot be reinstated exactly once it is disturbed, so the replacement detail is agreed before work starts rather than decided on the scaffold. The usual answer is a vapour permeable membrane on counter battens across the area being opened up, which keeps the roof breathing and gives the new frame something to lap into. On a listed building that change is part of the consent, and a conservation officer will want to see how far the membrane extends and how it terminates against the untouched torching either side. The conservation rooflight page covers how those units sit into a thick stone roof.
The 25mm ventilation gap, and how an opening blocks it
In a cold roof or an insulated rafter build-up there should be a clear ventilation path from eaves to ridge with at least 25mm of free air above the insulation, and 50mm where the underlay is a high resistance type. That path is continuous up each rafter bay.
Forming a rooflight opening interrupts it, because the frame occupies the full depth of the bay for the height of the window. Air arriving from the eaves in that bay now has nowhere to go. The answer is to carry the path around the obstruction with cross ventilation through the trimmers, or to run counter battens over the rafters so the gap is above the rafter line rather than between the rafters. Getting it wrong produces a cold, still zone in the roof immediately above the new window, and that shows up as black spotting on the plaster at the head of the reveal in the first February.
The layer on the warm side, and the slot it must not leave
The membrane above the insulation keeps liquid water out. The vapour control layer below the insulation keeps warm moist air from the room out of the construction, and it is the one that gets neglected because it is behind the plasterboard.
At a rooflight it is lapped onto the frame itself and taped, not cut off 20mm short and hidden by a plasterboard edge. A 20mm gap all the way round a 1.2 metre window is an open slot into the roof construction, and warm air will drive through it every time the heating comes on. Manufacturers supply a vapour collar for exactly this joint. Where one is not used, a proprietary airtightness tape onto the cleaned frame does the same work. The reveal detailing that follows is on rooflight reveals and why splaying them matters.
Tapes, staples and fixings that outlive the roof
Small components, and the ones most likely to be whatever was in the van. Staples for membrane work are stainless or at minimum galvanised, because plain steel staples through a damp membrane rust away and leave the sheet hanging on nothing after a decade.
Tapes are chosen for the membrane they are sticking to. Breather membranes want their own single sided or double sided tape, applied to a dry, dust free surface, pressed down rather than laid on. Bitumen felt takes a bitumen compatible tape and rejects most acrylics. Nothing gets taped in the rain. Where the weather turns during the job, the correct answer is to close the roof with the covering back on and do the taping the next dry morning rather than tape onto a wet sheet and bury it.
What the survey records about the membrane layer
The membrane is priced from what is found rather than from an assumption, so the survey writes down a short list before any figure is confirmed.
- Membrane type, identified from a lifted slate at the eaves rather than guessed from the age of the house.
- Its condition when flexed, and whether daylight is visible along the drape from inside.
- Whether the sheet discharges over the fascia into the gutter or behind it.
- Presence of sarking boards, their thickness, and whether they are square edged or tongued and grooved.
- Whether counter battens exist, and whether the ventilation path above the insulation is currently clear.
- Any existing openings, and whether their membrane was dressed or slit.
- Torching on a stone roof, and how much of it the opening will disturb.
- The likely extent of renewal, stated as an area rather than as a hope.
That list is why two identical windows on two identical looking roofs in the same street can carry different figures. The unit is the same. The layer underneath it is not. The costs page sets out how the range and then the fixed price are arrived at.
Next on this subject.
- Guide Trimming rafters for a pitched roof rooflight Trimming is the carpentry that lets a hole exist in a sloping roof without the roof noticing. A rafter is…
- Guide Rooflights in a trussed roof and what cannot be cut A trussed roof is not a set of rafters that happen to be joined together. It is a series of…
- Guide Soakers, aprons and head flashings explained A flashing set around a pitched roof rooflight is three separate components doing three separate jobs, and confusing them is…
- Guide Rooflight reveals and why splaying them matters The reveal is the plastered box between the frame of a rooflight and the ceiling of the room, and it…
- Guide Two rooflights side by side on one slope Two roof windows side by side on one slope is usually a better answer than one wide unit, and on…
- Guide Rooflights on a shallow pitch below 15 degrees Below fifteen degrees a pitched roof stops behaving like a pitched roof, and the whole approach to glazing it changes.…