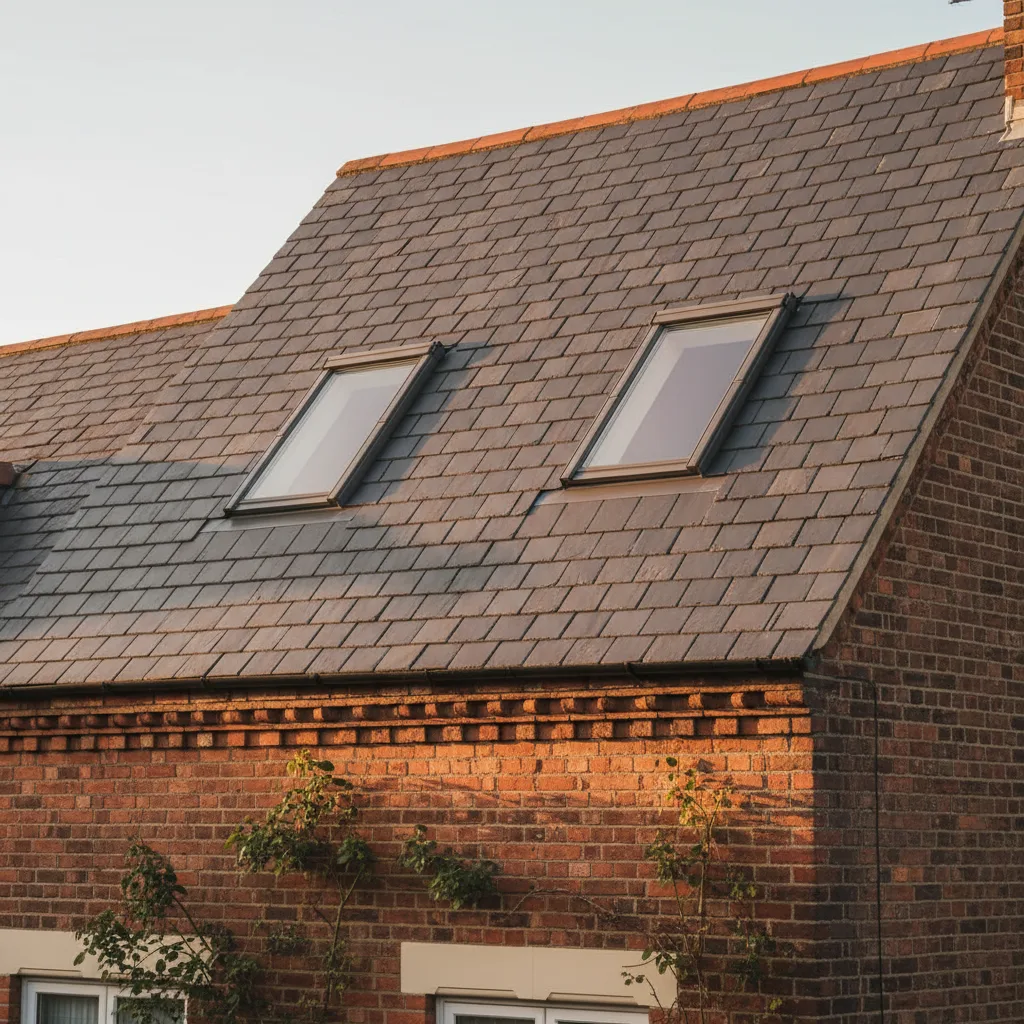
Two rooflights side by side on one slope
Two roof windows side by side on one slope is usually a better answer than one wide unit, and on most Gloucestershire roofs it is also the only answer the structure will allow. The reason is that a pair works with the rafters instead of against them: each window sits in its own bay, nothing structural gets removed, and the total glazed area beats what a single unit could achieve without a designed beam. The catch is that the gap between the two frames is not a free choice. It is a fixed dimension set by the flashing that runs between them, and getting it wrong by twenty millimetres means the covering cannot be closed. Everything below is the practical detail of setting out, trimming, flashing and lighting a pair. The single unit version of the job is on the roof window installation page.
The gap between the frames is a manufactured dimension
Manufacturers publish combination flashing kits for units mounted next to each other, and each kit is drawn for one specific distance between the two frames. The common figures for a side by side pair are 100mm and 18mm, depending on the kit and the covering, with wider spacings available on some ranges.
That distance is measured frame to frame, outside face to outside face, and it is not adjustable on site. The flashing that sits in the gap is a pressed component with a fixed width, and there is no version of the job where a joiner packs it out. Set the frames 60mm apart when the kit wants 100mm and the metal will not sit down. Set them 140mm apart and there is an open channel with nothing covering it.
So the order of decisions runs: choose the covering, choose the kit, read the gap off the kit, then set out the opening. Not the other way round.
Wide gaps and narrow gaps do different things to the roof
The narrow spacing, around 18mm, reads from inside almost as a single wide opening with a slim bar down the middle. The two frames are effectively touching, the flashing between them is a slim upstand, and there is no covering at all in the gap.
The 100mm spacing puts a genuine strip of tile or slate between the two units. It reads as two windows rather than one, and it needs a small piece of covering cut and supported in the gap, which is a fiddly detail on a plain tile roof and straightforward on a concrete interlocking tile. Wider spacings, where a manufacturer offers them, put a proper pier of covering between the two and each unit gets close to its own full flashing set.
The practical difference is water. Everything landing on the slope above both units has to get through or around the gap, and the narrower the gap the more concentrated that flow becomes.
The channel between two units, and where its water goes
Between two units the flashing forms a valley running down the slope, and it collects the water shed off the head flashings of both windows plus everything arriving from the roof above.
That channel discharges at the bottom, at the cill line, into the aprons. It is the highest-loaded piece of metal on the whole installation and the piece most likely to silt up with moss and grit off the slope above. On a shallow pitch it needs watching, because the flow is slower and the deposits build faster. On a 22 degree vale lean-to a pair of units with a narrow gap will collect debris in that channel within a couple of years, and it is worth putting on the list of things to look at when the gutters are done. The behaviour of the individual flashing components is set out on soakers, aprons and head flashings explained.
Counting rafter bays for a pair rather than for a single unit
Set out the pair by counting bays, because the rafters decide what is achievable before anything else does.
On a trussed roof at 600mm centres, the clear width between two trusses is around 550 to 570mm once the timber is measured properly. A 550mm wide unit sits in that gap with a head and cill trimmer and nothing else. Two of them in adjacent bays leaves one truss standing between them, and the frame-to-frame distance is therefore the truss thickness plus the two clearances, typically 90 to 110mm, which happens to land close to the 100mm combination kit. That coincidence is not accidental: the kits were drawn for exactly this arrangement.
On a traditional cut roof with rafters at 400mm centres, two units side by side means one rafter cut for each opening, which is two separate trimmed openings with an intact rafter between them. That is routine work and the structural detail is on the trimming rafters page.
Trimming two openings, and the member that stays whole
The rafter or truss between the two openings does more work than it did before, because it now takes load from the trimmers of both openings.
On a cut roof that usually means the central rafter is doubled, so the two openings share a doubled member rather than each having its own single one. On a trussed roof the truss between two 550mm units stays entirely intact, which is the whole reason the arrangement is preferred on modern estates, and that logic is set out further on the rooflights in a trussed roof page.
Where somebody wants one wide unit instead, the sums change completely. A 1,140mm wide window on a trussed roof means removing a section of truss and carrying it on a beam spanning to the trusses either side, with an engineer’s calculation and a Building Control submission before the covering comes off. The pair avoids all of it.
Lining the heads and cills through
Two units side by side are read as one composition from the garden, so any misalignment is obvious in a way it never would be on a single unit.
The heads are lined through on a string across the slope, and so are the cills, and both are checked against the batten gauge rather than against a tape measure off the eaves, because an old roof is rarely square. On a roof where the gauge has drifted, the correct answer is to set both frames to the same course of covering and accept that the measurement off the ridge differs slightly between them. A 10mm step between two heads is visible from thirty metres. A 10mm difference in the distance to the ridge is not visible at all.
Setting out from the room, and where the band of shadow lands
From inside, a pair produces two rectangles of daylight with a band between them, and where that band falls is a decision worth making deliberately.
In a loft bedroom, a pair centred on the room puts the band down the middle of the bed. Offsetting the pair 300mm so the band lands over a wardrobe or a walkway is usually better. In a kitchen under a rear addition roof, the band wants to fall over a doorway or a run of tall units rather than over the worktop. The two openings are set out from the room below in tape at full size before the covering comes off, in the same way a lantern position is, and the adjustment costs nothing at that stage.
Daylight from a pair against daylight from one wide unit
A pair of 550 by 1,180mm units gives about 1.3 square metres of glazed area. A single 1,140 by 1,180mm unit gives about 1.35. On raw area they are almost identical, which surprises people who assume the wide unit must win.
What differs is distribution. Two apertures separated by a metre light two zones of the room and produce softer overlapping shadows in the middle, while one aperture lights one zone brightly and leaves the corners darker. On a north-facing slope, where all the light is diffuse anyway, the pair is noticeably more even. On a south-facing slope in summer, the pair also spreads the direct sun into two moving rectangles rather than one large one, which is easier to live with in a bedroom.
Matching sizes, or pairing an opening unit with a fixed one
The two units do not have to be identical, but they do have to be the same width and the same length if the combination flashing kit is going to work, because the kit assumes both frames present the same edges to the gap.
Within that, one can be a centre pivot or top hung sash and the other a fixed light. That is a genuinely useful combination in a loft bedroom, where one opening unit satisfies ventilation and escape and the fixed unit next to it costs less and has a slimmer sightline. It is also common where one of the pair is high above a stairwell and cleaning the opening version would be unrealistic. Powered opening on the opening half is covered under electric rooflight installation.
Escape, ventilation, and the unit that has to meet the figures
Where the room below is a loft conversion, only one of the pair needs to satisfy the escape requirement, and that simplifies the specification considerably.
The escape unit needs a clear openable area of at least 0.33 square metres, with 450mm minimum in both height and width, and the bottom of the opening between 800 and 1,100mm above the floor. A 550mm wide unit is tight against the 450mm clear width once the sash frame is deducted, so the escape half of a pair is often a wider unit than the fixed half, which then rules out the combination kit and pushes the two apart into separate flashing sets. That is a real design decision and it gets settled early. Purge ventilation is calculated on the whole room, so both units count toward it whether they open or not.
Four arrangements on one slope, compared
| Arrangement | Structure needed | Flashing | Best where |
|---|---|---|---|
| One wide unit, 1,140mm or more | Truss or two rafters removed, designed beam, engineer’s calculation | One standard kit | The room needs one large aperture and the budget carries the structure |
| Two side by side, narrow gap | Two bays trimmed, member between stays whole | Combination kit at the published spacing | Reading as one wide opening from inside without the beam |
| Two side by side, 100mm gap | Two bays trimmed, member between stays whole | Combination kit plus cut covering in the gap | Estate roofs at 600mm truss centres, the common case |
| Two side by side, well separated | Two independent trimmed openings | Two full independent sets | Lighting two zones of a long room, or working round a purlin |
| One above the other | One bay, two trimmed openings in line | Combination kit for a vertical pair | A steep slope with a low knee wall and headroom above |
Purlins, hips and the things that stop a pair fitting
Two openings need roughly twice the clear rectangle of one, and Gloucestershire roofs do not always have it.
An interwar hipped roof at Warden Hill or Hucclecote has a purlin across the slope at about mid-height and a binder in the ceiling below, so the clear vertical run between the purlin and the ridge is often only 1.2 metres. A pair fits across that band comfortably; one tall unit does not. On the same roof, the hip narrows the slope towards the corner, so a pair set too far along the slope will find the second unit running out of covering at the side. On a Victorian rear addition in Gloucester or Tewkesbury the run from gutter to abutment can be 1.8 metres, which is enough for a pair of short units across the width and not enough for anything tall.
Three or more in a row, and where the argument stops
The logic that makes two better than one keeps working for a while and then stops.
Three units in adjacent bays on a long rear slope is a good arrangement and it is common on loft conversions, giving an even wash of light down the length of a room. Beyond three, the strips of covering between the units start to look like an afterthought and the number of channels carrying concentrated water up the slope grows. At that point the honest conversation is about whether a single large made-to-size unit with a designed structural opening is the right thing instead, which is a different job with a different programme. Loft conversion arrangements specifically are covered on the rooflights for a loft conversion page.
Programme and cost for a pair against a single unit
Two units on one slope in one visit is efficient work. One scaffold, one covering strip, one Building Control notification, one visit from the plasterer.
The second unit adds the price of the unit itself, the combination kit rather than a second standard kit, a second trimmed opening, and a second reveal to board and skim. What it does not add is a second mobilisation, and that is the largest single saving. Fitting a second unit a year later on a fresh scaffold typically costs more than fitting it alongside the first, which is why the question gets asked at survey even when the enquiry was for one. The itemised approach to figures is set out on the costs page.
What the survey settles before a pair is ordered
A pair has more variables than a single unit, and all of them are fixed before anything is ordered.
- Rafter or truss centres, measured over four or five bays rather than one.
- The thickness of the member that will sit between the two openings.
- The combination kit available for the covering, and the gap it is drawn for.
- Clear run of slope: gutter to purlin, purlin to ridge, and the distance to any hip or valley.
- Which unit is the escape unit, if the room below is habitable.
- Where the band between the two apertures should land in the room.
- Whether both units open, and whether either needs powered operation.
Those seven answers decide the pair completely. Once they are settled the work is two ordinary installations run as one job, and the roof is closed at the end of each day exactly as it would be for a single unit.
Next on this subject.
- Guide Trimming rafters for a pitched roof rooflight Trimming is the carpentry that lets a hole exist in a sloping roof without the roof noticing. A rafter is…
- Guide Rooflights in a trussed roof and what cannot be cut A trussed roof is not a set of rafters that happen to be joined together. It is a series of…
- Guide Soakers, aprons and head flashings explained A flashing set around a pitched roof rooflight is three separate components doing three separate jobs, and confusing them is…
- Guide Rooflight reveals and why splaying them matters The reveal is the plastered box between the frame of a rooflight and the ceiling of the room, and it…
- Guide Rooflights on a shallow pitch below 15 degrees Below fifteen degrees a pitched roof stops behaving like a pitched roof, and the whole approach to glazing it changes.…
- Guide Underlay and sarking around a pitched rooflight Every pitched roof lets a little water past its covering, and the underlay is what catches it. Wind drives rain…