Replacing a rooflight in a finished loft room
A rooflight in a finished loft room is replaced from outside, and that single decision governs everything else about the day. The covering comes back, the flashings come off, the old frame lifts out through the roof, and the new one goes down into the opening from above. Done that way the plaster, the paint, the carpet and the fitted wardrobe under the cill are never touched, and the room the homeowner leaves in the morning is the room they come back to. It is a different proposition from a replacement in a bare loft or a building site, where nobody minds a bit of grit on the floor. The wider replacement job, from reading the data plate to closing out the notification, is set out on the replacing a failed or misted rooflight page, and the installation principles behind it are on the skylight and rooflight installation page. This one is about the constraint that a decorated room puts on the work, and how the day is arranged around it.
Why the work is planned from the outside in
An in-plane roof window is held in the opening by brackets screwed to the rafters or trimmers through the sides of the frame, and those brackets are reached from the roof side once the covering and the flashing kit are off. Nothing about removing the unit requires anyone to be inside the room, and nothing about setting the new one requires the internal lining to be disturbed.
That is not obvious to a homeowner looking up at a plastered box with a window at the top of it. From inside, the frame looks built in. In reality the plasterboard reveal is fixed to a timber lining that is itself fixed to the trimmers, and the frame sits outboard of all of it. The frame can leave and a new one can arrive without the plaster knowing anything happened, provided the two frames are the same size and the fixing line lands in the same place. Those two conditions are what the survey exists to confirm, and they are confirmed with a tape rather than assumed from a size code.
What a survey records in a room that is already finished
The survey sheet for a finished loft room carries a set of measurements that nobody bothers with in an empty attic. The internal opening is measured at the head, the cill and both jambs, because a reveal built in 1989 is rarely a true rectangle and the smallest of the four dimensions is the one that matters. A straight edge goes across the plaster face to record how flat it is. The depth from the plaster face to the inside of the old frame is measured at all four corners, which tells you how much timber lining sits between the two and therefore how much tolerance is available.
Then the room itself: what is under the opening, what cannot be moved, where the loft hatch is, how the stair runs, whether there is a carpet or a boarded floor, and whether the ceiling has been skimmed or is painted plasterboard with taped joints. Skimmed plaster tolerates vibration better than a taped joint does. All of it goes in the notes, and it is the reason the fixed price for a replacement in a finished room is not the same as for the identical unit on the same roof over an unconverted loft.
Getting to the elevation when the garden is smaller than the roof
Access decides more of this job than the unit does. A loft room window is by definition at second-floor level or higher, so a tower is rarely enough and an independent scaffold with a working lift at the eaves and a second at the opening is the normal arrangement. That has to land somewhere, and in a Gloucester terrace on Barton Street or a Stroud valley cottage the somewhere is a shared passage, a stepped path or a neighbour’s side return.
Three things get settled before a date is offered. Where the standards stand and what they stand on, because a scaffold foot on a soft border sinks and a scaffold foot on a manhole cover is not acceptable. Whether the boards can be carried in by hand, which in Chalford and Rodborough usually means yes and usually means a longer day. And where the old sash is going to be laid down, because a 1140mm wide unit coming off a roof is heavy, awkward and made of glass, and it needs a flat clear space at ground level rather than a flowerbed.
Protection inside the room, and the order it goes down in
Protection is laid before anything is unloaded, not after the scaffold is up. The order matters because each layer covers the edges of the one below it.
- Carpet or floor first, in a self-adhesive protective film for a hard floor or a heavy fleece-backed sheet on a carpet, taken past the opening by at least two metres in every direction.
- Furniture that can move, moved out of the room entirely rather than shuffled to the far wall, because a room with everything in one corner is a room nobody can work in.
- Furniture that cannot move, wrapped rather than draped, with the covering taped to itself and never to a polished or painted surface.
- A dust wall across the doorway with a zipped access, so the rest of the house is a separate space from the moment work starts.
- The stair and the landing carpet protected on the route in and out, because the traffic damage happens on the way to the room rather than in it.
None of that is remarkable and all of it is the difference between a tidy job and a bad afternoon. It also has a practical benefit for the work itself: a protected floor is a floor people can put a knee on when they are working overhead at the reveal.
Three sources of dust, and which one actually reaches the room
People expect the dust to come from the roof, and mostly it does not. Stripping tiles and lifting slates produces grit and moss on the outside of the roof, and the underlay is still in place beneath it, so very little of that finds its way in. The three real sources are different.
The first is the underlay itself when it is cut back around the opening. Old bitumen felt is brittle and sheds a fine black dust as it breaks, and that falls straight through the gap between the frame and the trimmer into the void behind the reveal. The second is the frame fixings coming out, because thirty-year-old screws in softwood bring shredded timber with them. The third, and by far the largest, is any cutting or grinding done inside the room, which is why cutting is planned out of the sequence wherever possible.
The gap between the old frame and the timber lining is taped from inside before the covering comes off. It takes fifteen minutes and it stops nearly all of the first two sources. Where the reveal does have to be opened, cutting is done with a dust-extracted tool at the source rather than with a sheet on the floor and a brush at the end.
The old sash out, the old frame out, and the two ways they leave
A centre pivot sash lifts off its pivots once the barrel bolt is released and the sash is rotated past the service position, and on most ranges it comes away as a single glazed panel. That is the heavy part gone before anything structural is touched, and it is why the sash is removed first rather than lifting the whole unit as an assembly.
The frame then comes out as an empty rectangle, which is light enough for two people and rigid enough not to twist on the way. It is lifted upwards and outwards onto the scaffold, never dropped into the room. On a top hung unit the sash is unhooked at the hinge arms in the same way. On an older unit where the hinges have corroded solid, the glass is taken out of the sash first and the sash frame is dealt with as timber, which is slower but keeps a seized 1985 hinge from deciding where a pane of glass goes.
The fixing line, and the millimetres that decide whether the plaster survives
Here is the detail that determines whether the reveal is touched. A roof window frame has a nominal size and a required structural opening around 40 to 45mm larger, and where the frame sits within that opening is set by the bracket positions and by how deep the frame is bedded into the plane of the covering. Manufacturers have changed all three over the years.
What that means in the room is that a new frame of the identical nominal size can sit 5 or 10mm deeper or shallower than the old one, and the internal timber lining that the plasterboard is screwed to was cut to the old frame. Ten millimetres either way is usually absorbed in the lining. More than that and the plasterboard edge either stands proud of the frame or falls short of it, and either way there is a line to make good.
So the frame depth is checked against the manufacturer’s fixing dimension before the order goes in, and the brackets are set to land the new frame on the same internal plane as the old one wherever the range allows it. Where it does not, that is said in advance and the making good is priced, rather than discovered at four o’clock with the plasterer already gone home.
Timber linings, architraves and what the plaster is actually attached to
The plasterboard reveal is not fixed to the window. It is fixed to a softwood lining, usually 25mm stock, that runs around the inside of the opening and is nailed or screwed to the trimmers and to the sides of the rafters. Where a plasterer has skimmed straight up to the frame, there is often a bead or a scrim at that junction and sometimes a bead of decorator’s caulk over the top of it.
That junction is scored with a knife before the frame moves, all the way round, so the skim breaks on a clean line rather than tearing a strip of paper off the board face. It is a two-minute job that saves an hour. Where there is a timber architrave or a moulded surround, it is unpinned, labelled, and set aside in the room rather than levered off and binned, because a 1990s ovolo architrave in a loft room was cut to the mitres of that particular opening and will not be matched from a merchant’s rack.
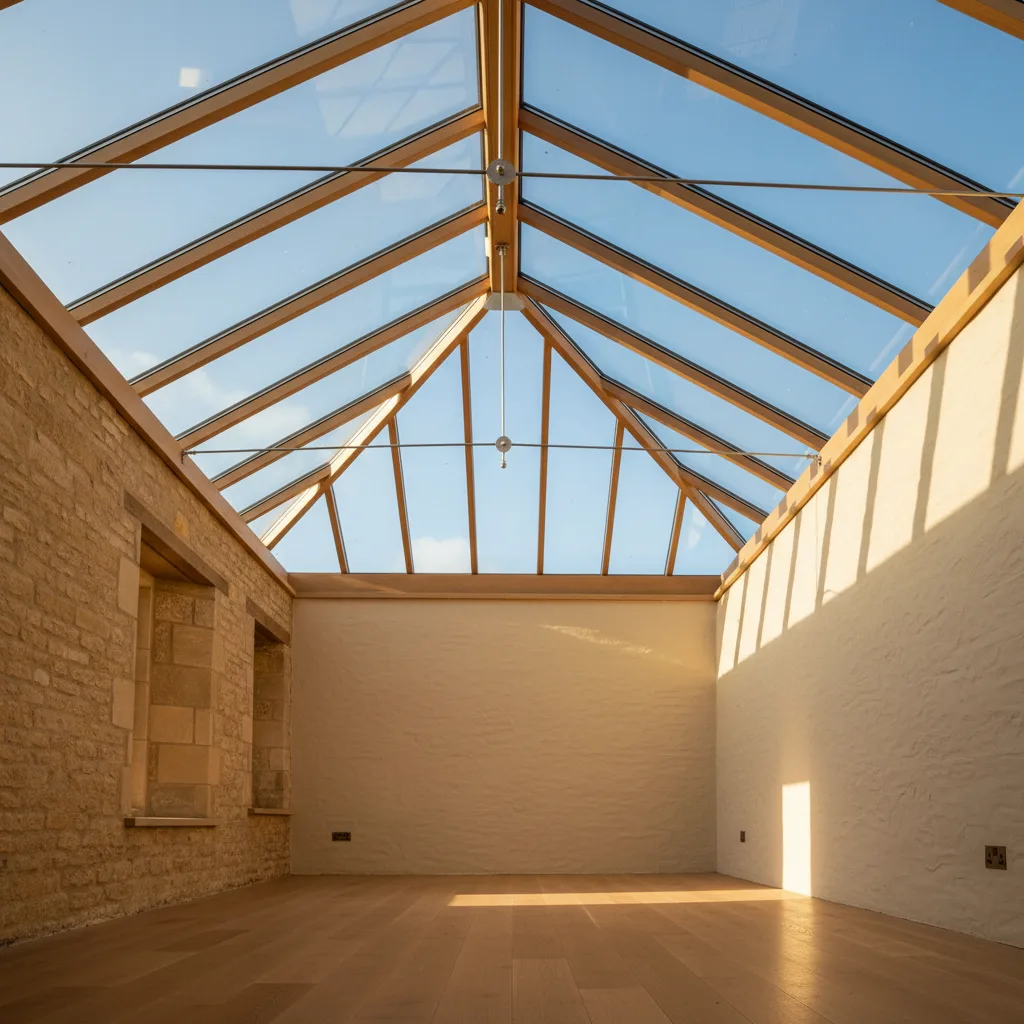
When the reveal does have to be opened, and how that is decided
There are four situations where the internal finish is opened, and all four are known before the date is booked rather than found on the day.
| Situation | How it is identified at survey | What is involved inside |
|---|---|---|
| The opening size changes | The old size does not repeat in any current range, or the room needs a larger unit | Lining, plasterboard and skim renewed on all four faces, and the ceiling line moves at the head |
| Insulation is missing or compressed at the perimeter | Cold spotting or mould in the top corners, or a thermal image taken on a cold morning | One or more faces opened, insulation reinstated tight to the frame, vapour layer taped, board and skim renewed |
| The trimmer or lining timber is wet | A moisture meter reading taken at the reveal corners and through a small hole in the lining | Affected timber cut out and replaced in treated stock, then the face rebuilt |
| The frame sits at a materially different depth | Frame fixing dimensions compared between the old range and the new one | A margin made good on all four faces rather than a full rebuild, usually a plasterer’s half day |
What is worth knowing is that the second of those is the common one. A 1990s installation with insulation stopping 100mm short of the frame looks perfect in a photograph and has been quietly growing black spotting in the head corners every February since. Where the survey finds it, opening one face to correct it is a better outcome than leaving a known cold bridge behind a new window, and it is put in the quotation as a priced item rather than as a possibility. The reveal detail itself is on rooflight reveals and why splaying them matters and the physics behind it on thermal bridging at the rooflight perimeter.
Blinds, blackout tracks and the fitted furniture under the cill
Loft rooms accumulate things attached to the window. Internal blinds are made to the size code and clip into a groove in the frame profile of their own generation, so a blind from a 1998 sash does not go into a current frame even at an identical nominal size. Blackout side channels are screwed to the timber lining and can usually be taken off and refitted, though the screw holes will need filling if the new frame is a different depth.
Fitted furniture is the other one. A great many Gloucestershire loft conversions have a run of eaves storage or a built-in desk directly under the rooflight, because that is where the head height is. It rarely needs to move for an outside-in replacement, but it does need to be covered properly and it needs to be accessible if the reveal is being opened at the cill. Anything screwed into the cill lining itself gets photographed before it is unfixed. Blind options are set out at roof window blinds and when to specify them.
Doing it in a day, and what the sequence actually looks like
A like-for-like swap in a finished room is a one-day job outside where access allows it, and the day has a shape. Protection and taping inside first thing. Covering stripped back above and to the sides of the opening, tiles or slates stacked on the scaffold rather than thrown down. Flashing kit off, underlay cut back to sound material. Frame fixings out, frame lifted clear. Opening checked with a level and a straight edge, trimmers probed with a moisture meter, and the new frame offered in dry to confirm it sits square before a single screw goes in.
Then the reverse: frame fixed and packed square, underlay renewed locally and dressed up over the head and into the frame’s drainage channel, flashing kit set with the apron over the covering below and the head under the course above, covering re-laid to the original gauge with cut pieces mechanically fixed. Sash rehung, unit opened and closed, drainage channels checked clear. Inside, the tape comes off, the reveal junction is inspected, and the floor protection is lifted last.
Where the reveal is being opened, that is a second day with a plasterer, and it is booked as a second day at the outset. A wet skim in a loft room in November needs a night with some heat in the room before anything is painted over it.
The roof is closed every evening, and what that means with a room underneath
The rule that an opening is never left open overnight is not a slogan on this job, it is the reason the sequence runs the way it does. With a finished room below, an opening covered with a sheet is a room with a sheet for a ceiling, and a February night in the Severn Vale will find the edges of it.
In practice that means the covering does not come off until the new unit is on the scaffold, unwrapped and checked against the order for size code, glazing code, handing and transit damage. If the forecast turns during the morning, the outside work stops at a point where the roof is whole, which may mean the old unit going back in temporarily and a second visit. That is a better outcome than the alternative and it is why the weather is looked at properly the day before rather than optimistically on the morning.
The loft hatch, the eaves cupboards and the rest of the house
A converted loft usually still has voids behind the knee walls, and those voids connect to the rest of the roof. Cutting back underlay above the opening puts debris into the rafter space, and the rafter space runs down to the eaves and into the cupboard behind the bed. Those doors get taped shut for the day.
Where the loft room has been formed with a hatch to a remaining void, the same applies. And in a Gloucester terrace with a party wall that stops at ceiling level rather than continuing to the underside of the covering, which is common in Victorian stock, there is a route into next door’s roof space as well. It is worth knowing about before somebody starts cutting, and it is one of the things looked for during the survey rather than discovered by the neighbour.
Decoration afterwards, and where the line is drawn
On a like-for-like swap with the reveal untouched, there is nothing to decorate. That is the whole point of the approach, and it is worth saying plainly at the quotation stage so nobody budgets for a decorator who is not needed.
Where a face has been opened, the finish is taken to a skimmed and dry surface ready for paint, with the junction beaded and the line straight. Painting is a separate trade and it is a good idea to leave new plaster in a loft room for a couple of weeks before a mist coat goes on, because a loft dries at a different rate from a ground floor room. Matching an existing paint colour is a conversation to have with whoever painted it last, and a photograph of the tin in the garage is worth more than any colour chart.
Gloucestershire loft rooms, and the three that come up most
The 1980s and 1990s conversion on an interwar semi in Longlevens, Hucclecote or Charlton Kings is the most common by a distance. Cut roof, purlins, concrete interlocking tile, a pair of centre pivots in the rear slope, plaster reveals in good order, and units now at the end of their service life. These are the ones that come out and go back in a day with nothing touched inside.
The trussed estate conversion at Quedgeley, Abbeydale, Bishops Cleeve or Yate, using attic trusses or a designed opening between standard trusses at 600 centres, is the second. Narrow 550mm units, sound trimmers designed in with the roof, and the same straightforward outcome. The third is the Stroud valley or Forest of Dean cottage, where the room in the roof may be two hundred years old, the covering is Welsh slate or Cotswold stone, and the reveal is a deep plastered box in a roof 300mm thick. Those are slower, the access is the hard part, and a conservation unit is often the right replacement rather than a modern roof window. Access and covering both feed into the figure, which is set out on the costs page.
What to settle before a date goes in the diary
Five things, and all of them are cheaper to settle in advance than to resolve on the day. Whether the size repeats, confirmed by tape rather than by code. Whether the frame depth lands the new unit on the same internal plane. Whether the reveal is being opened, and if so on which faces and on which day. Where the scaffold stands, and who needs to be asked. And what is coming out of the room, who is moving it, and when.
Send photographs of the room from inside showing the reveal and the ceiling around it, a close-up of the top corners, the roof from the garden, and the data plate on the sash if you can reach it, to info@severnskylightsgloucester.co.uk. That is enough for an indicative range by email, and the survey then turns it into a fixed price with the internal work either in it or explicitly out of it. Town by town coverage is on the areas pages, and the written guides at guides go further into the individual questions.
Next on this subject.
- Guide What a rooflight costs in Gloucester Two rooflights of exactly the same size and specification, one going into a Quedgeley semi with a driveway and concrete…
- Guide Sizing a rooflight for the room Size a rooflight from the room, not from the roof. The roof sets the limits and it will tell you…
- Guide Roof window or rooflight, and the difference Once the vocabulary is straight, a real decision is left behind it: for a given room on a given roof,…
- Guide Flat roof against pitched roof rooflights Most people arrive at this question having already chosen a product and then discovered the roof has opinions. It is…
- Guide What happens on installation day A rooflight installation is one of the few pieces of building work that opens the outside of your house and…
- Guide Cleaning and maintaining a rooflight A rooflight asks for about an hour a year. Twenty minutes twice, in spring and autumn, plus the glass cleaned…